How to assemble a 240VAC 30A Power Meter Box
BLOGS
3/5/20223 min read
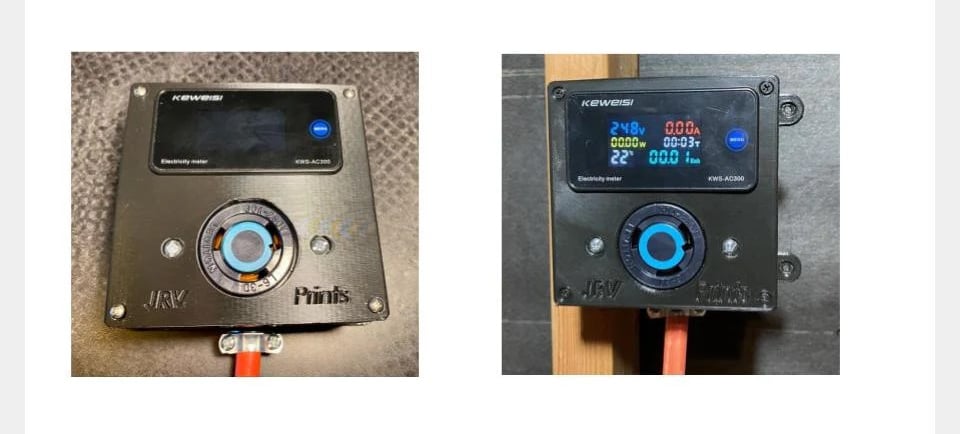

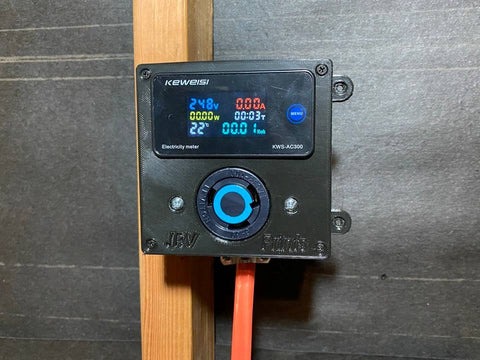
This post provides instruction to assemble and install your JRV Electrical Power Meter Box for L6-30R, 250VAC 30A receptacles. This Box features a bright color LCD display with no dead angle, and shows key electrical data including, Volts, Watts, KWH, Amps, Cumulative Time, and Temperature. The L6-30P receptacle features a locking mechanism to secure the electrical plug. Ideal for Crypto Mining or Garage Equipment.
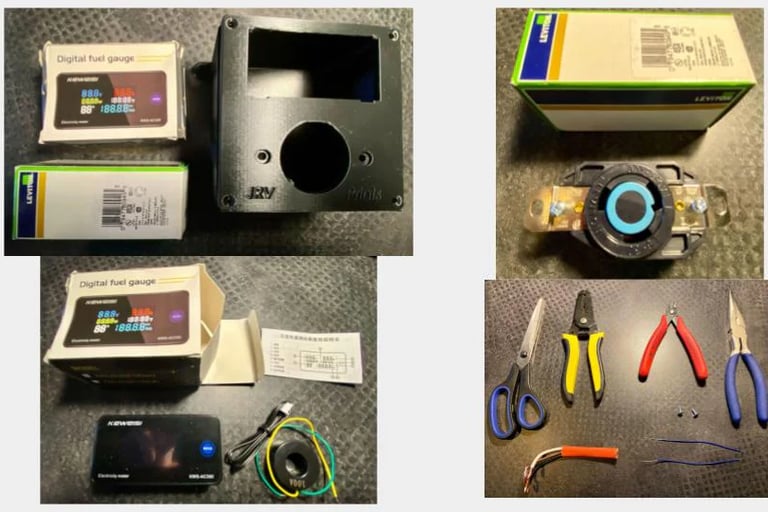
Required Parts:
1x Keweisi Digital Meter Display (KWS AC300) - Amazon Link
1x Leviton L6-30R Receptacle - Amazon Link
1x JRV Power Meter Box (from jrvprints) - Link
1x 10/2 Indoor Electrical Wire (10 gauge) - Amazon link
2x Screws #6-32 1/2in - Amazon Link
2x Low-power wires to power supply the display. 3-4 inches long, 30-33 Wire Gauge (AWG).
Disclaimer: this page includes affiliate links. If you click and purchase, JRV prints may receive a small commission at no extra cost to you.
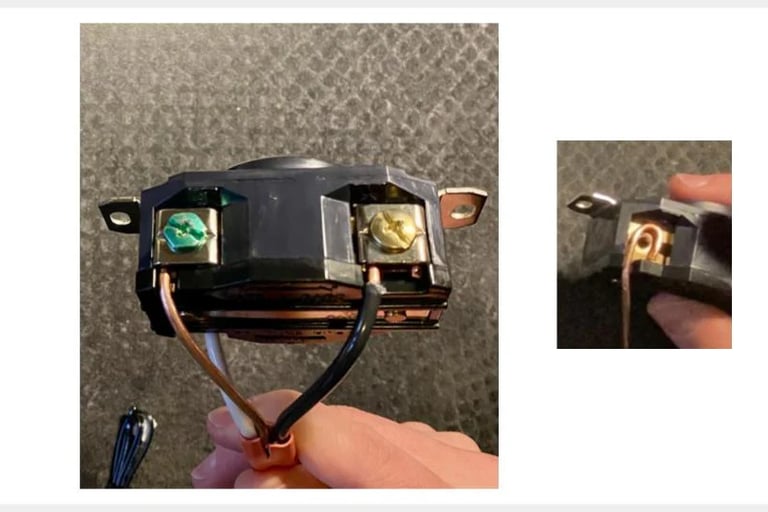
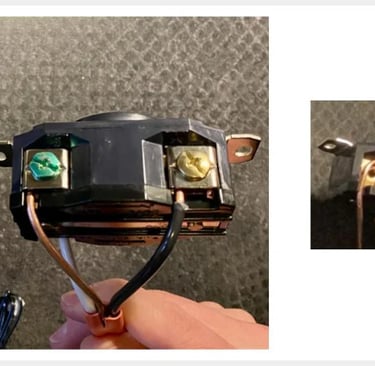
Receptacle Connections
Connect hot lines to the receptacle, there are the white and black wires shown in the picture below. Connect ground wire to Ground (G), this is the green bolt below.
Use 2x Screws #6-32 1/2in to attach the receptacle to the enclosure box (The original screws that come in the Leviton package are too long)
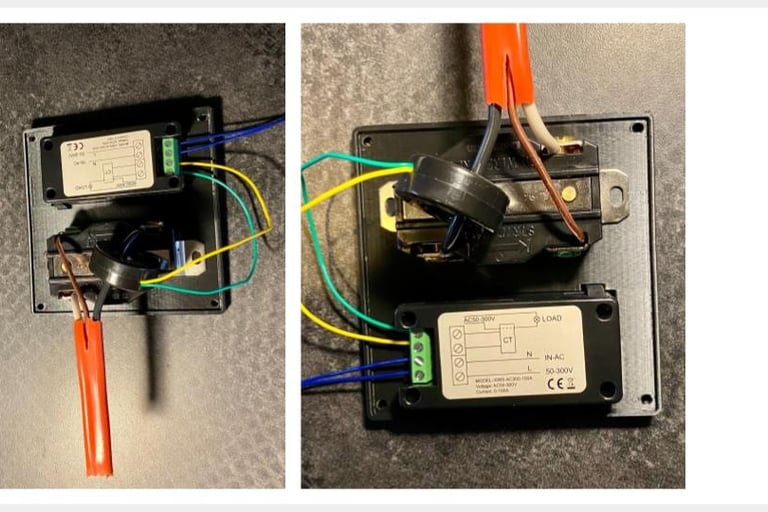
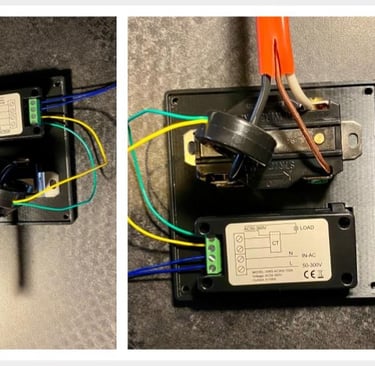
Connecting Hall Sensor
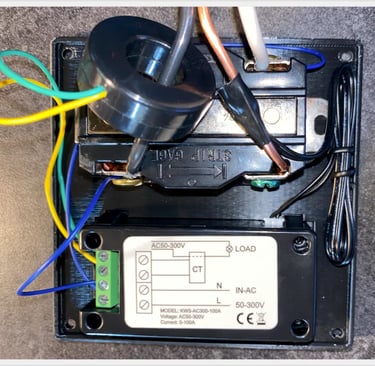
- Connect the Hall Sensor (Current Sensor) to one of hot lines. No need to connect to Ground or to both lines. The Display Meter calculates accordingly. These is the black circle sensor with yellow and green wires.
- Finally connect the halls sensor's yellow and green cables to the display's CT terminals.
Final Assembly
- Connect Keweisi Digital Meter Display's Temperature Sensor: Connect the two pin terminal as shown in the picture, and attach it to the ground wire with black wiring tape. Note: you can place the temperature sensor anywhere. For example, outside the box to get ambient temperature. You can also decide not to use the temp sensor. The display will still operate normally.
- Connect Keweisi Digital Meter Display's Power Supply: Provide 240 VAC to the display meter by connecting the blue wires to each hot line as shown in the picture below. Connect these two wires to the displays' N, L terminals (In-AC)

- Finally screw the lid to the enclosure box. Reconnect your power breaker and test your connections by checking the voltage output of the receptacle.
- You should expect the display always on, showing 0's and the current temp if nothing is connected.

THIS IS NOT ELECTRICAL ADVICE. Please hire your local professional electrician.
JRV Power Meter Box is a prototype for non-production purposes.
Questions, ideas contact us
JDV Design
Colorado, USA